Shokupan

If you don't have 3 hours to devote to bread making and own a food processor, I've written up a quicker version here!
EDITED (1/29/17): I've made this countless times now and have a few minor tweaks for an even fluffier bread. Main changes are upping the speed of the standmixer to 4 from 2 for more kneading, dividing the dough into 2 balls instead of 3, bench rest of 20 minutes instead of 10-15 minutes, and proofing the second round until the dough is about 4 inches in height. Also, I often skip the water roux and just add the flour and water portion into the dry and wet ingredients because 1) I'm lazy and 2) I freeze my bread once cooled and sliced so it stays fresh without the roux. I have updated the directions and recipe below for these changes.
There are countless recipes for Hokkaido milk bread on the internet, which is shokupan's sweeter cousin. It's absolutely delicious but too sweet for the daily bread. The shokupan is the true workhorse. It makes a toast that pairs so perfectly with butter that you can eat it every single day. And if you're a fan of jam or nutella, you can slather it on shokupan without the overwhelming sweetness. So what makes a good bread?
I did more research for this recipe than any before (not going to lie there were spreadsheets involved). And part of it is, my training was in savory. But also, bread baking is tricky business. So I tried to make the most foolproof recipe using pantry staples so you wouldn't have to run to the grocery store just to make bread. I am by no means a pastry cook, so if I can do it, so can you.
I made a few different batches of shokupan but kept getting failures. It was too sweet, too soft to hold shape, too dense and/or too rough. What I was seeking for was a neutral but flavorful soft and fluffy white bread. So I went back to basics and started with the basic bread formula. It uses the baker's percentage which means all ingredients are quoted in percentage of flour. The key to a basic moist well risen bread is 70% hydration, 1% yeast, and 2% salt (in other words, if there's 100g of flour, you would use 70g water, 1g yeast, and 2g salt). With just 4 ingredients, you can make a very decent bread much better than any semi-shelf stable ones found in your grocery aisles.
I knew that for rich flavors, milk and egg would do the trick. Yeast has a hard time proofing in milk so one of the things you can do is scald the milk before use. But sometimes I run out of milk so I decided to go the instant dry milk route. You can use non-fat to full fat, whatever you choose. Although I didn't want an overly sweet bread, it wouldn't be Japanese bread without sugar so that went in the recipe as well.
Last but not least, the tangzhong roux. The name was coined by Yvonne Chen in her book "The 65° Bread Doctor" and is a pudding like roux made from 1 part flour to 5 parts water. It makes breads softer, fluffier and last longer. I've tried breads both with and without the tangzhong and the ones with are definitely lighter and stay moist for longer. I scoured the web to read up on why this method works but there seems to be no consensus. Harold McGee, please help?
Now that we've covered some bread basics, let's get started on the tips and tricks. By the way I am super lazy so I use a stand mixer to knead my dough. There are tons of literature online on how to knead dough by hand. It just requires some elbow grease and a little bit more time.

Step 1: Measure out and mix the dry ingredients. If you have instant dry yeast (I like using Saf Instant Yeast which will last you years in the freezer even if you bake bread every week) you can add it in here, otherwise you should portion out some of the water and sugar in the recipe to bloom the yeast in a small bowl and add with the wet ingredients.

Step 2: Make that tangzhong! The key is to whisk in the flour really well into the water before you turn on the stove. Heat up on medium low and continuously stir being careful to get the edges as well until the water roux thickens up to a pudding consistency. When you take a spatula to it you should be able to see the bottom of the pot.


Step 3: Add all of the wet ingredients except for the butter and mix with the dough hook on medium (setting 4 if on Kitchen Aid stand mixer) for 5 minutes. It will look really dry in the beginning but it should come together by the 5 minute mark (shown above).
Step 4: Add pads of room temperature butter and let the mixer go for another 10-12 minutes on the medium setting. The dough will temporarily come apart but don't fret! The butter will eventually be kneaded in and the dough will come together. The dough should be slightly tacky after 10 minutes.


Step 5: Shape the dough into a ball with your hands and place in a greased bowl. Cover with plastic film and let it proof for an hour or so in a warm place until the dough has doubled in size (time will depend on the temperature, ideal temp is around 75-85°F).

Step 6: Punch down the dough, cut it into two equal pieces and roll into balls again. Let the dough bench rest for 20 minutes covered by plastic film or a towel.

Step 7: Roll out each ball of dough in an ellipse and fold into thirds vertically. Roll out the dough again into a long ellipse and roll up (perpendicular to the direction you folded the dough into thirds). Pinch the ends into the dough to secure tightly.

Step 8: Place both rolls of dough into a greased loaf pan with the stitched end side down and cover with plastic film for second proofing. It should take anywhere from 40 minutes to an hour for the rolls to expand to the height of the loaf pan and cover all gaps. If the loaf pan is less than 4 inches in height, I would proof it above the height of the pan. Sometime during the second proofing is a good time to preheat the oven.
Step 9: Bake the loaf at 350°F for 35 minutes. The bread should be golden brown and have a hard crust. For your first couple of times, use a cake tester to make sure the bread is fully cooked.

Step 10: Remove the bread from the loaf pan and let it cool on a rack so that the bread doesn't continue to steam itself.

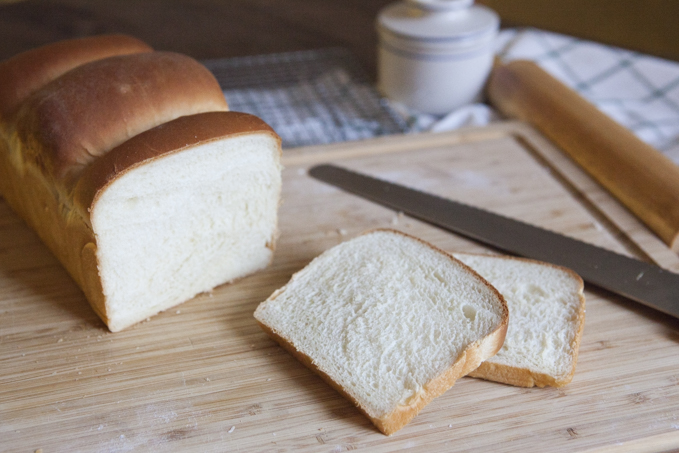
After 10 steps, you get to enjoy your beautiful new fluffy Japanese white bread. My favorite way to eat it is toasted with some good creamy butter.
Last tip (I know this post is really really long): bread freezes amazingly well. I slice up my entire loaf into 10 thick slices and use small pieces of plastic film in between each slice and store the entire loaf in a freezer gallon ziploc bag. That way, every morning I can just take a slice out of my freezer and pop it in my toaster oven. It just requires an additional 1 minute and it tastes just as good as the first day.
Note: I have been sticking with imperial and volume measurements since most readers are in the US without a scale, but for baking I have to insist on metric and weight based recipes for consistency as accurate measurement is crucial.

Hello thank you so much for this recipe! It's one of my favorites I make it at least once a week! If you were to use your dough hook on setting 2 how long should I let it go. The kitchen aid manual says not to use the dough hook over setting 2 so I've always been scared to go higher. Love the recipes on this blog thank you!
ReplyDeleteAlso can I double this recipe and separate into 4 balls, and cook in 2 separate pans?
Delete