Quicker and Easier Shokupan

The shokupan post is without a doubt my most popular and I'm so grateful that people love it. I continue to make it on a weekly basis because our family loves toast for breakfast. Because I make it so often, I noticed that I don't always have the full 3 hours to devote to bread making. For the time constrained days, I simplify the ingredient list and use a food processor. It shaves off about 45 minutes from the original method. So I wanted to share with you the quicker version today. In fact, the food processor is a better tool for building up the gluten in shokupan. Since I don't have a dish washer and the food processor has so many parts to hand wash, I switch it up with the stand mixer when I have plenty of time to spare. If you are lucky enough to own a dishwasher, I highly recommend using the food processor.
Step 1 - Measure: Before I do anything, I measure out 20g butter and cut it into small pieces so that it comes up to room temperature by the time I need it. This is key. Don't forget. Then, I measure out all the dry ingredients in a separate container (because you can't attach the food processor bowl after measuring ingredients) and dump them in the food processor bowl with the bread blade (attached to the machine!). So that's 350g bread flour, 24g sugar, 14g dry milk, 7g salt, 4g instant dry yeast. Then, measure out 245g room temperature water.
Step 2 -Mix dough: Pulse a couple times to mix the dry ingredients. Set the timer for 1 minute 50 seconds and process while pouring the water in through the small feed tube. After the wet and dry ingredients are mixed, add the pats of room temperature butter. Set the timer for 1 minute and process. You'll probably need to hold down the food processor or it might fall off the counter as it'll move around a lot. If you see that the butter is getting stuck, stop and mix into the dough by hand and continue processing.
So instead of 15 minutes of kneading with the stand mixer, we've now cut down the time to under 3 minutes. Now the best part is that because the food processor warms up the dough, it will proof much faster and at room temperature!
Step 3 - First proofing: Either flour or grease up your hands (the dough will be extra tacky) and take the dough out and shape into a ball. Place the dough in a large greased bowl and cover with saran wrap. Leave at room temperature for 30-40 minutes until the dough doubles in size. After this step, it's exactly the same as the original shokupan (step by step instructions with pictures in the original).
Step 4 -Bench Rest: Punch down the dough, cut it into two equal pieces and roll into balls again. Let the dough bench rest for 20 minutes covered by plastic film or a towel.
Step 5 - Shaping: Roll out each ball of dough in an ellipse and fold into thirds vertically. Roll out the dough again into a long ellipse and roll up (perpendicular to the direction you folded the dough into thirds). Pinch the ends into the dough to secure tightly.
Step 6 - Second Proofing: Place both rolls of dough into a greased loaf pan with the stitched end side down and cover with plastic film for second proofing. It should take anywhere from 40 minutes to an hour for the rolls to expand to the height of the loaf pan and cover all gaps. If the loaf pan is less than 4 inches in height, I would proof it above the height of the pan. Sometime during the second proofing is a good time to preheat the oven.
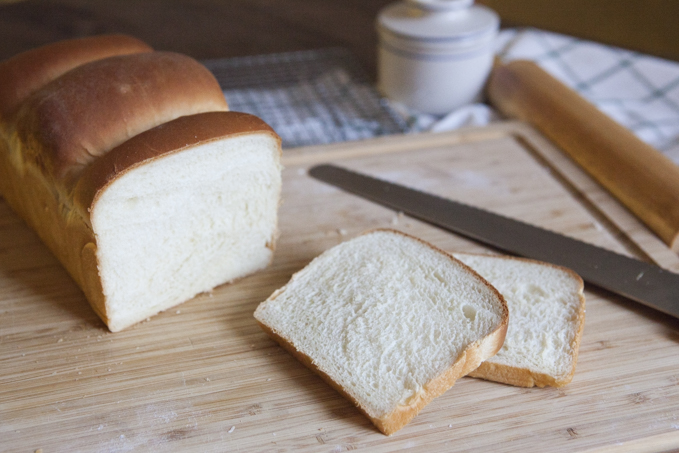
Step 7 -Baking: Bake the loaf at 350°F for 35 minutes. The bread should be golden brown and have a hard crust. For your first couple of times, use a cake tester to make sure the bread is fully cooked.
Step 8 - Cool Bread: Remove the bread from the loaf pan and let it cool on a rack so that the bread doesn’t continue to steam itself.


Hi, just wondering is your old post for shokupan is gone? I'm trying to find the recipe for it but couldn't see it.
ReplyDeleteHere it is! Sorry none of the photos are working as I have yet to reupload everything but the recipe is here: https://www.dreamsofdashi.com/2023/01/shokupan.html
DeleteThank you so much..
DeleteHello, what's the size of the mold? Isn't easy to measure ingredients without knowing it...thanks
ReplyDelete